Aqua Table Distressing...
Designer Furniture at bargain prices!
I created my aqua table distressing project for those of you who appreciate great looking aged pieces of furniture, but cringe at some of those price tags you've seen then end up walking away all sad and forlorn because you know that that fashionably distressed table would have gone perfectly in the playroom, entry way or living room.
Fear not, it can be done, and your wallet will not be the one to get pinched for it!
This will be a satisfying and rewarding project for you...guaranteed! It will take a bit of patience in allowing dry time before each layer of color is applied, but it will be well worth the effort!
WHAT YOU NEED
- A solid wood piece of furniture, in this case a $10 coffee table...bargain!
- At least 5+ different colors of acrylic paint
- Painting gloves, painting tray, brushes, rollers and paint stir sticks, as well as containers for mixing custom colors (if mixing your own)
- Drop cloth
- Palm sander, sandpaper in various grits
- Protective eye wear
- Hammer or small lengths of heavy chain. Optional - screwdrivers or chisels
- Tack cloth
- Paste wax
Below
is the my custom color palette which I used for this fun aqua table
distressing project. Of course you can use your own color palette, but
if you love the results I got from these colors...use them!

Valspar and Valspar Signature is the brand of paint I used for this aqua table distressing project and the colors I chose are:
Clock Tower AR728;
Prairie Willow 6001-7B;
Like Butter 3005-A;
Blue Arrow 5001-13;
Urban Sunrise 40041B;
Classic Teal 5011-8;
Cracked Pepper C157
What to do for YOUR aqua table distressing project...
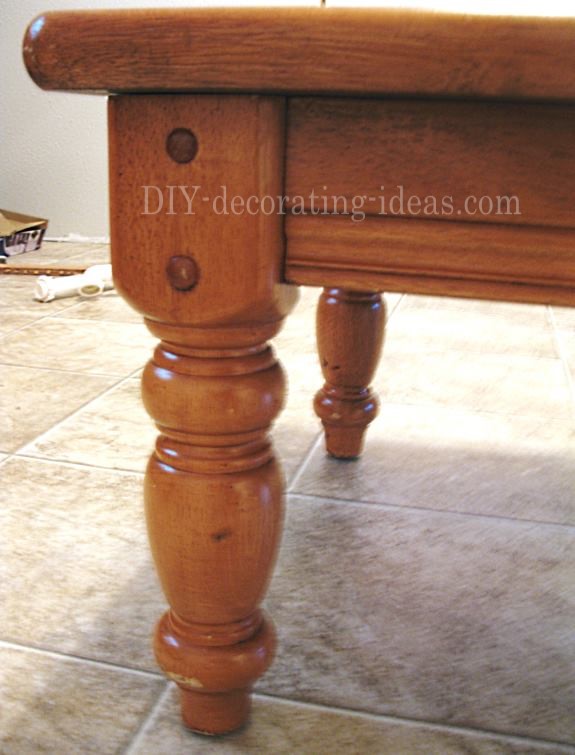
Well let's get started! Here it is. The solid wood, $10 bargain, "warm honey glazed ham" table in all its glory that will be my satisfying aqua table distressing project! Of course the finish needed help, so I decided to go "bold" in my choice of paint finish.

NOTE: This table has "good bones" as I like to say! Never mind the finish...
remember that it can be changed if it's not your preference. When you are looking at second hand pieces of furniture look beyond the finish and test for sturdiness and durability!
1
1. Prep your area to be painted, wipe clean then give an all over light sanding. A primer can then be applied if you wish, but in this case since we will be sanding all the way back down to bare wood no primer is necessary.
2
2. Take your first color that you wish the table to be. Paint entire piece evenly. Let dry until tacky. I chose Chocolate Brown, here is Chocolate Brown Paint...

TIP: Painting Spindle Legs
Flipping the piece over if possible, in this case a coffee table, makes for painting spindle leg pieces easy as pie!
This way you won't miss painting the inner sides of the turned legs. Nothing worse than thinking you are finished then realizing long after you have cleaned up that you missed a bunch of spots!

3
3. Next take your second color of choice and paint over the first color covering the entire table with another even but not too thick coat of paint. It does not have to be absolutely perfect as these layers will be covered by more layers of color. Pretty much the more imperfect it is the better it will get! Below is Sage Green going over the Chocolate Brown paint.
P.S. Don't mind my mess...in some of the pictures you will notice that our house is going under full throttle kitchen remodel. Check out more here...[coming soon]

4
4. Continue to paint layers of color when each layer of paint is dry to the touch. You can paint as many layers as you like.
The paint layer order I chose for this aqua table distressing project went like this: Chocolate Brown, Sage Green, Light Butter Yellow, Vintage Denim Blue, Dark Grey and then a Peacock Blue.
Check out my color palette! You can re-imagine this project color pattern in your own way!

5
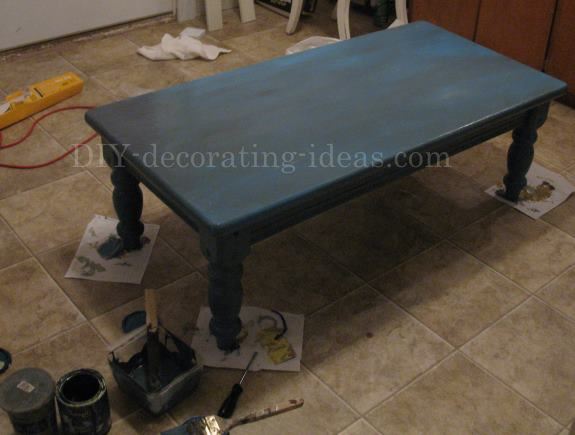
5. As you get closer to your final layer color I found it helpful to NOT paint the table with an even coat for each layer, but in "patches". This will make sanding through the layers easier for you!
6
6. Let table dry, not completely though, the longer you let it dry the harder it will be to sand through the layers.
7
7. In hindsight I would highly recommend planning out how you would like the piece to be distressed and then work backwards applying your paint, layering it in more specific areas rather than painting the entire table every layer. This will save you drying time, paint and elbow grease in sanding your piece.

8
8. This is the funnest part of my aqua table distressing!
Choose the areas you would like to be distressed the most. To expose some raw wood I found it helpful to scrape away most of the paint with a knife.
Go in with some rough grit sandpaper to break up the paint and gradually work your way to a finer grit paper, all the while working on the distressed look you are trying to achieve.
This is where painting the piece in "patches" will benefit you most! It will save you time and energy.
Remember...
You can do whatever you want with this piece!
You can choose to whack the piece with the heavy chain in select spots or ding it up with some other tools such as a hammer chisel, screwdriver etc. The trick is to make it look very well used, weathered and aged.
Be creative here...

[Sorry I don't have any pictures of me tearing madly into this particular aqua table distressing step, but hopefully some of you DIYer's will attempt a similar project and submit pictures depicting yourself having fun distressing a piece of furniture...LOL. Go here to submit your project]
9
9. When you are finished sanding and distressing your piece, wipe down with a tack cloth.
10
10. After some sanding was done, I 'spot painted' with a darker teal and black.
11
11. You can seal your piece and protect it with paste wax if you wish. Go here to learn about different kinds of paste wax and how to properly wax furniture...[coming soon]
12
12. Once you have finished waxing your piece of furniture give it a good rub down to make it shine. The more buffing you do the shinier it gets!

13
13. Taaa daaa!
Absolutely fall in love with your NEW vintage piece and let it be the centerpiece and conversation for your room...or entire house!

Wow! Such a transformation! And it can all be done with a little paint and patience! Can you believe it!? Not bad for a second hand find! Just think of the possibilities!
NOTE: I must say this is one of our more enduring fashionable pieces of furniture, plus a favorite with all the guests!
WE ABSOLUTELY LOVE, LOVE IT!
More Tables!
After doing my aqua table distressing, I couldn't resist experimenting with other tables...
Check out my fabulous faux wax black coffee table DIY project here...
Or my white herringbone end table DIY project here...
Rescue Recycle Reuse
From my artistic eye, I'm always trying to re-create looks of furniture or textiles that I've seen at markets, stores or in books and magazines from junk or second-hand stores...but for less, much less.
Warning: If you continue following my transformations, soon you will not be able to pass by a second-hand store, garage sale or even Craigslist without wondering if that piece of junk can be transformed into something spectacular.
It's a hobby. I love it. And I love sharing my results with you. If the transformation bug has bitten you, be sure to share your project, idea or advice with other DIY Decorators here...
Share Your Thoughts or Project
Do you like this project? Do you have anything to add to it? Have you done a project similar to this? Using my methods? Please share your DIY project or add your comments for all my visitors.

|
|
|
|
|
|
|
Newsletter

June Tailor and Quilt As You Go sewing kits
Since 1961, June Tailor has been developing and manufacturing innovative products for pressing, cutting, piecing and quilting for all levels of sewists from novice to advanced. June Tailor has it all!
Sewing & Cutting Cabinets
The perfect solution for any sewing room! Choose from hundreds of sewing cabinets, cutting tables and sewing chairs with features like rolling caddies, dedicated storage, multi-position lifts and more. Go here to find yours!
TRADE UP AND GO!
How Does It Work?
Trade in your GO! Me or GO! fabric cutting machine to get a great deal on a new fabric cutter!
Step 1
Select your trade-in fabric cutter model and credit method and purchase a Fabric Cutter Trade Up Set.
Step 2
Use the shipping label included with your new fabric cutter to send us the trade-in fabric cutter. Please follow all instructions provided in your confirmation email.
Step 3
Get your trade-in credit once we receive and validate the trade-in fabric cutter.
Go here to learn more!

Recent Articles
-
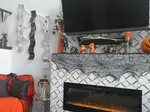
DIY Fireplace Makeover
Oct 03, 24 12:16 AM
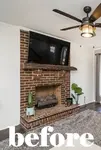 Make your space stunning with the DIY Fireplace Makeover that is also budget friendly.
 -
Less stressful Way to Purchase Traditional Middle Eastern rugs
Jul 10, 22 06:03 PM
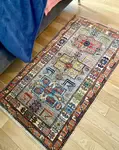 I have always found the purchase of a traditional Middle Eastern rug to be a stressful experience as they are a huge investment. But they are so beautiful
 -
Seasonal Decoration Changes
Feb 27, 21 05:34 PM
 I am in the later half of my life. I have always dreamed of having a home that was a neutral background and I could use artwork and decor to change the